
How to Print Designs on Gloves: A Complete Guide
Table of Contents
Introduction
Printing custom designs on gloves has become increasingly popular for businesses, sports teams, promotional campaigns, and personal branding. Whether you’re looking to create work gloves with company logos, sports gloves with team emblems, or fashion gloves with unique designs, understanding the various printing methods and techniques is essential for achieving professional results.
This comprehensive guide will walk you through everything you need to know about glove printing, from selecting the right printing method to executing flawless designs that stand up to daily wear and washing.
Key Benefits of Custom Glove Printing:
- Enhanced brand visibility and recognition
- Professional appearance for work environments
- Team unity and identification in sports
- Unique fashion statements and personalization
- Increased perceived value of products
Popular Printing Methods for Gloves
Screen Printing
Screen printing remains one of the most popular and cost-effective methods for printing on gloves, especially for large quantities. This technique uses a mesh screen to transfer ink onto the glove surface through a stencil.
Advantages:
- Excellent for bulk orders (50+ pieces)
- Vibrant, long-lasting colors
- Cost-effective for large quantities
- Works well on various glove materials
Best suited for: Simple designs with solid colors, corporate logos, and bulk promotional items.
Heat Transfer Printing
Heat transfer printing involves applying pre-printed designs to gloves using heat and pressure. This method is perfect for small batches and complex, multi-colored designs.
Process highlights:
- Design is first printed on special transfer paper
- Heat press applies the design to the glove
- Temperature typically ranges from 300-350°F
- Application time: 10-15 seconds
Best suited for: Small quantities, detailed designs, and quick turnaround projects.

Digital Printing
Digital printing technology allows for direct printing onto glove surfaces using specialized printers. This method offers exceptional detail and color accuracy.
Key features:
- No minimum order quantities
- Photographic quality prints possible
- Quick setup and production
- Ideal for prototype development
Embroidery
While technically not printing, embroidery creates raised, textured designs that are extremely durable and professional-looking.
Characteristics:
- Premium, luxury appearance
- Exceptional durability
- Three-dimensional effect
- Limited to simpler designs
Essential Equipment and Materials
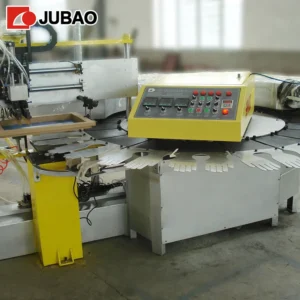
Glove Printing Machines
Investing in the right glove printing machine is crucial for professional results. Modern glove printing machines are specifically designed to handle the unique challenges of printing on curved, flexible surfaces.
Types of Glove Printing Machines:
1. Manual Glove Printing Stations:
- Perfect for small businesses and startups
- Lower initial investment ($500-$2,000)
- Suitable for screen printing and heat transfer
- Production capacity: 20-50 gloves per hour
2. Semi-Automatic Glove Printing Machines:
- Increased efficiency and consistency
- Price range: $3,000-$8,000
- Built-in heating elements and pressure controls
- Production capacity: 100-200 gloves per hour
3. Fully Automatic Glove Printing Systems:
- High-volume production capabilities
- Investment range: $10,000-$50,000
- Computer-controlled precision
- Production capacity: 300-500 gloves per hour
Additional Supplies
Essential materials for glove printing:
- Inks: Plastisol, water-based, or specialty glove inks
- Screens: Various mesh counts (110-200 for most glove applications)
- Squeegees: Different durometers for various ink types
- Transfer papers: For heat transfer applications
- Adhesive sprays: To secure gloves during printing
- Cleaning solutions: Screen cleaners and degreasers
Step-by-Step Printing Process
Preparation Phase
1. Design Preparation:
- Create your design in vector format (AI, EPS, or PDF)
- Ensure design size is appropriate for glove dimensions
- Consider glove material and texture in design choices
- Prepare color separations if using multiple colors
2. Material Selection:
- Choose gloves compatible with your printing method
- Consider material composition (cotton, polyester, leather, etc.)
- Test print on sample gloves first
3. Equipment Setup:
- Clean and calibrate your glove printing machine
- Set appropriate temperature and pressure settings
- Prepare screens or transfer materials
- Organize workspace for efficient production flow
Printing Execution
Screen Printing Process:
- Secure glove on printing surface using spray adhesive
- Position screen accurately over design area
- Apply ink to screen and flood the design
- Use squeegee to press ink through screen onto glove
- Carefully lift screen to reveal printed design
- Cure ink using heat gun or conveyor dryer
Heat Transfer Process:
- Pre-position transfer design on glove
- Set heat press to appropriate temperature (usually 320°F)
- Apply medium pressure for 12-15 seconds
- Allow to cool before removing transfer paper
- Peel transfer paper smoothly to avoid damage
Quality Control
Implementing rigorous quality control measures ensures consistent, professional results:
- Visual inspection: Check for print clarity, color accuracy, and alignment
- Adhesion testing: Verify ink bonds properly to glove material
- Wash testing: Test durability through washing cycles
- Flexibility testing: Ensure prints don’t crack when gloves are flexed
Professional Tips and Best Practices
Optimize Your Printing Results:
- Temperature control: Maintain consistent temperatures for even ink curing
- Pressure consistency: Use even pressure across the entire design area
- Timing precision: Follow recommended exposure times for each printing method
- Material compatibility: Always test new glove materials before full production runs
Cost-Saving Strategies:
- Bulk purchase inks and supplies for volume discounts
- Optimize design layouts to minimize waste
- Maintain equipment properly to extend lifespan
- Train staff thoroughly to reduce errors and reprints
Design Considerations:
- Keep designs simple for best results on textured surfaces
- Consider glove seam placement when positioning designs
- Use high-contrast colors for maximum visibility
- Account for glove stretching in design sizing
Common Issues and Troubleshooting
Print Quality Problems:
Issue: Ink bleeding or smudging
- Cause: Excessive ink application or incorrect viscosity
- Solution: Reduce ink thickness, adjust squeegee pressure
Issue: Poor ink adhesion
- Cause: Inadequate surface preparation or wrong ink type
- Solution: Clean glove surface, use appropriate primer if needed
Issue: Uneven color coverage
- Cause: Inconsistent pressure or worn squeegee
- Solution: Replace squeegee, maintain consistent printing pressure
Equipment Issues:
Glove printing machine maintenance:
- Regular cleaning of all components
- Lubrication of moving parts as recommended
- Calibration of temperature and pressure settings
- Replacement of worn parts before they affect print quality
Conclusion
Successfully printing designs on gloves requires the right combination of equipment, materials, technique, and attention to detail. Whether you’re using a basic manual setup or investing in an advanced glove printing machine, the key to success lies in understanding your chosen printing method, maintaining consistent quality standards, and continuously refining your process.
Start with small test batches to perfect your technique before moving to larger production runs. With practice and the right approach, you can create professional-quality printed gloves that meet your customers’ expectations and stand up to regular use.
Remember that the glove printing industry continues to evolve with new technologies and materials. Stay informed about industry developments, attend trade shows, and consider joining professional associations to keep your skills and knowledge current.
